My next trip to the boat had two objectives – finish removing the exhaust elbow, and get that damn plate off the bottom (it was leaking, and I have no need for a HF radio grounding plate).
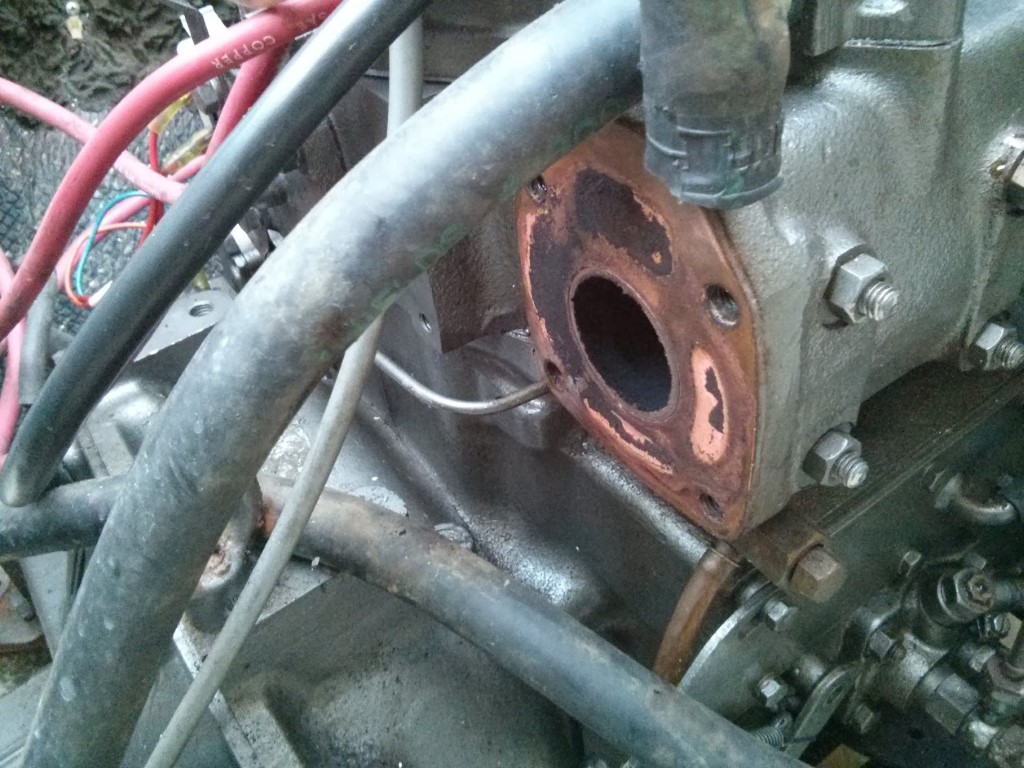
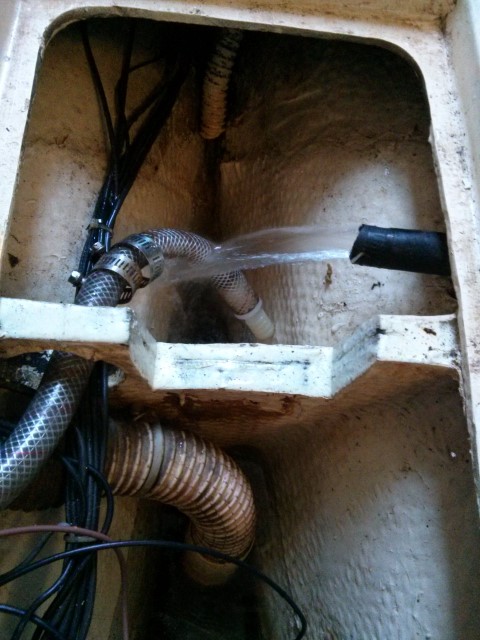
For the first thing, thanks to my research on the internet, I’d discovered that trying to remove the elbow from the flange was apparently a fools game, only attempted by absolute idiots who had no job even being NEAR a boat *shuffles feet*. The best way to do it is to remove the flange itself from the engine – it’s held on by four bolts. Four very, very stiff bolts, you can see them here (its the ones to the left of the pic, you can only see three of them).
I found again what a different the right tools made. I managed to get the first two (nearest to the camera) off by yanking really really hard, but the last two were a lot harder to reach – not helped by the fact I had to crouch in a 2′ x 3′ box. I managed to get one more off by kicking the wrench until it loosened, the last one I managed to do by whacking the wrench with a hammer. I know I probably didn’t invent this but I was SO PROUD of myself. Here is the engine without the elbow/flang on it, and here is the removed elbow (with the exhaust hose still on, it did NOT want to come off.)

Next, time to unscrew the plate. Long story short, it didn’t work. It was getting dark, so packed up my tools and left, after giving it another squirt of oil.
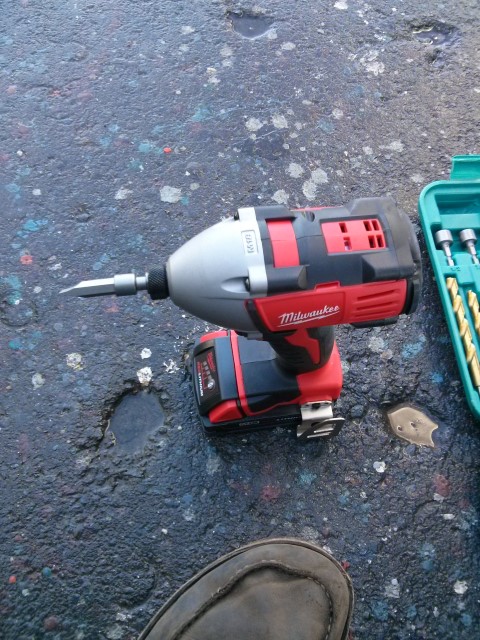
The next day, I returned with a new toy – an impact driver! HELL YES. EAT SHIT SCREW, BAMBAMBAMBAMBAM.
Below is the driver, it really is great. It’s like a drill but works in microbursts, meaning it can pack a bunch of power into each turn. It also goes BAMBAMBAMBAMBAMBAM which is awesome (I’m a child)
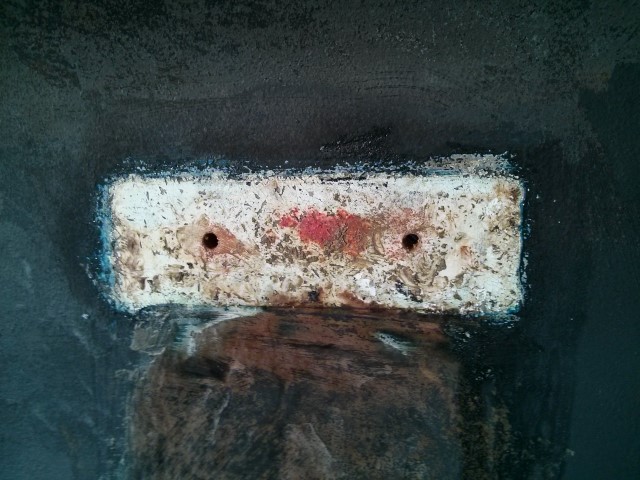
Armed with this new weapon, I loosened both screws BUT! They refused to come out. Guessing the screw itself was knackered, I tried to use a screwdriver behind the plate to put pressure on the screw when this happened:
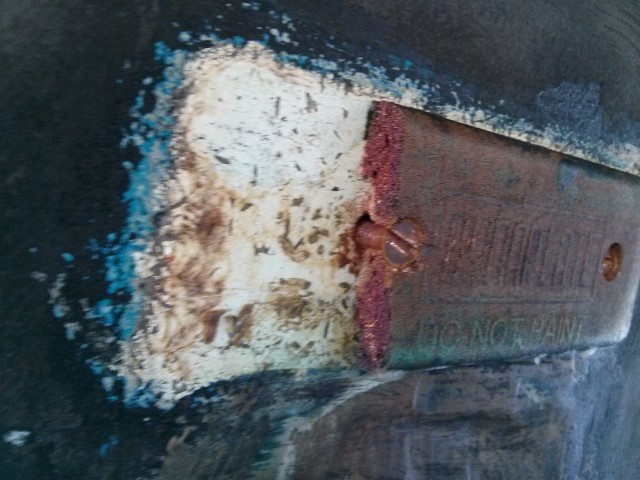
A third of the block just fell off. Well, that works right? I started on the other side and then the entire thing just crumbled off. Well, I’ll take it. The damn screws would still not come out, despite turning freely. I headed inside the boat to see if I could spot where they were attached and – aha – what is this in the bilge?
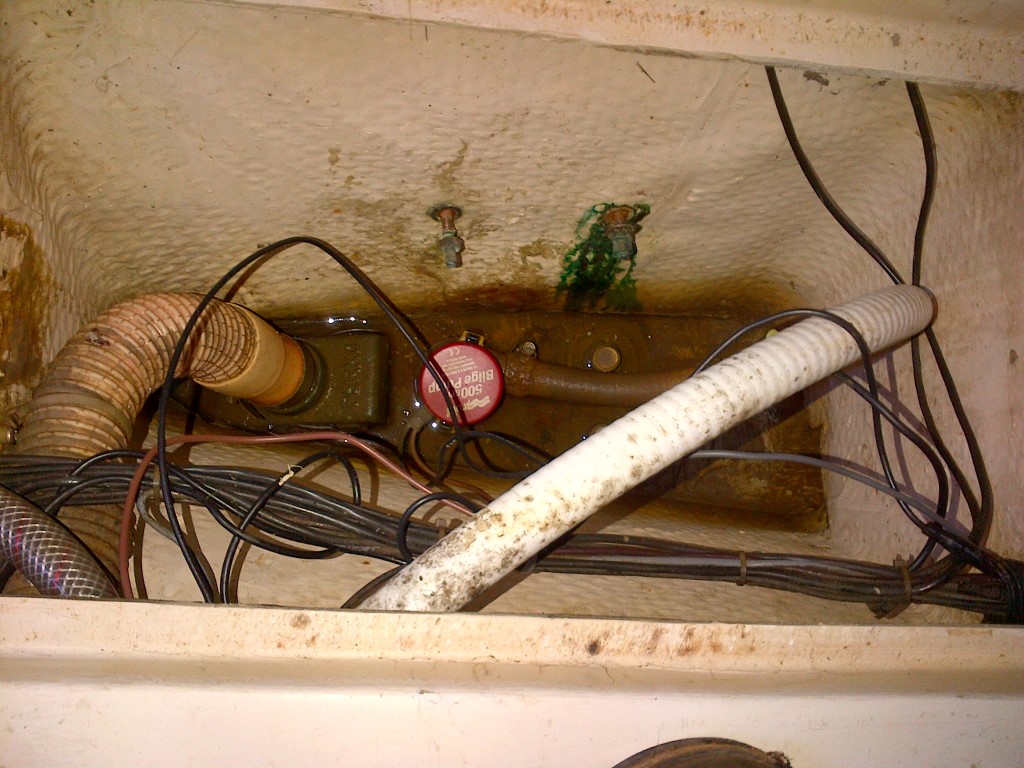
Nuts! Ignoring the fact if I’d noticed these earlier I wouldn’t have needed the impact driver, I started unscrewing them. The first one came off with no trouble, but the second one was well and truly jammed in. Ideally, someone would hold the nut in place with a wrench while I went outside to unscrew it. But, I was on my own. So I came up with a cunning plan:
Going for the subtle approach, I duct-taped a wrench onto the side of the bilge, after attaching it to the nut. I was ready to try it out. I went out of the boat, got the impact driver and a few BAMBAMBAMBAMs later it was loose! Sometimes I amaze myself.
I decided to leave it at that, since the next stage would involve me doing some research to see if I had to dry out the holes before filling.
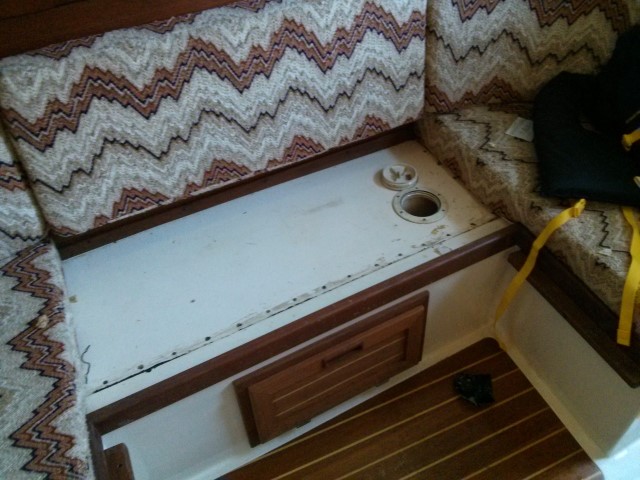
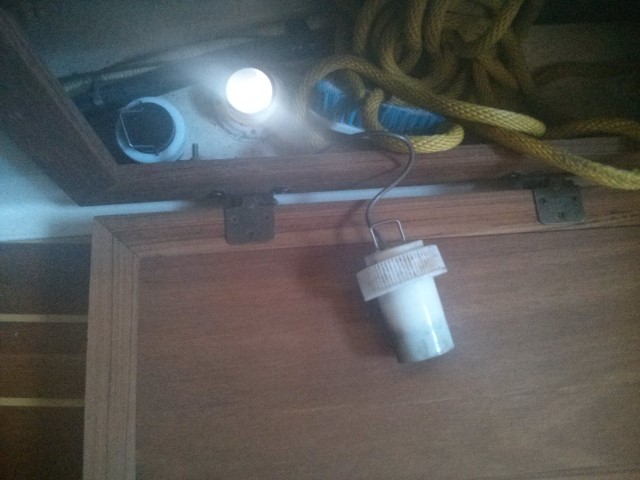
Next, I decided to empty the water tanks, in preparation for cleaning at a later date. There are two tanks, one under each sofa as seen below.
The easiest way to do this was to disconnect the cross feed between the two sofas and let the water drain into the bilge. That worked like a charm, and soon all the water was outside the boat.
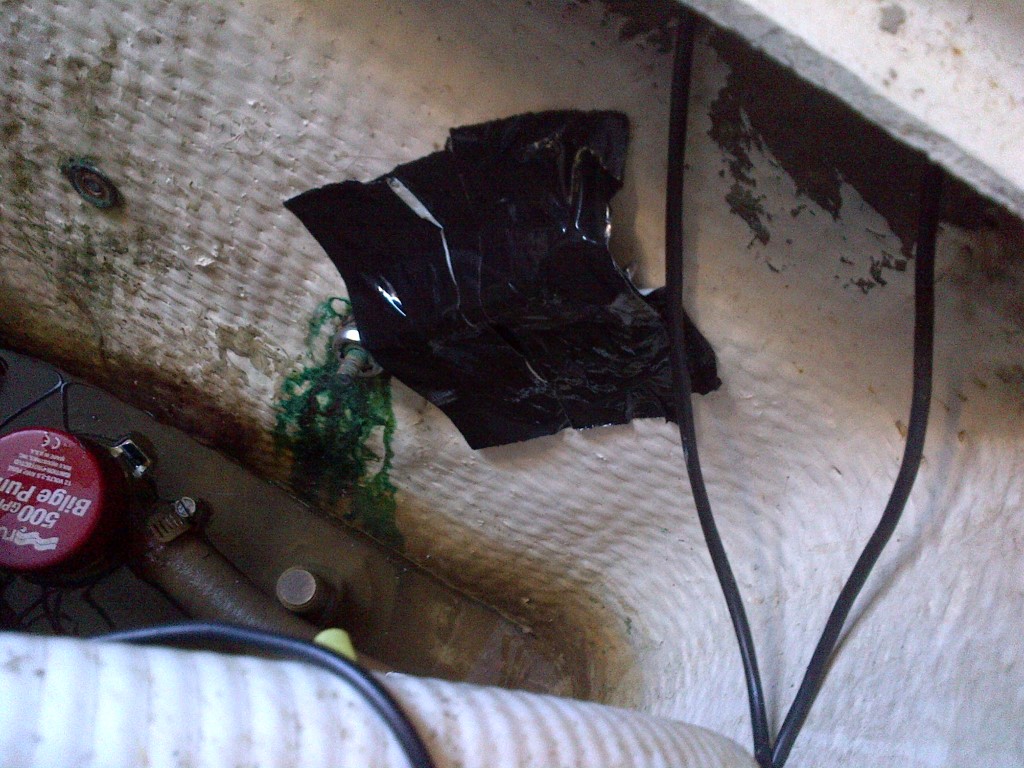
While I was under the sofa, I decided to unscrew the ‘water tank fill cap’. Which led to this.
Apparently, it wasn’t the water tank fill cap, but was in fact the weird old transducer on the bottom of the hull. This meant two things
1) I can easily replace it with a model that actually works
2) I’M REALLY REALLY GLAD I DIDN’T UNSCREW THAT ‘WATER TANK FILL CAP’ WHILE THE BOAT WAS IN THE WATER. SWEET JESUS. That would have been not good, at all.
Onto the next thing!
While I was poking around the bilge, I noticed some water left in there there. I tried running the bilge pump, but the pump wasn’t mounted low enough to get all the water out. So it’d had water in it for forever basically. And it was NASTY. And there was only one way to get it out. Sadly, I got the Giant Sponge that I’d bought and started soaking and squeezing, and soaking and squeezing…

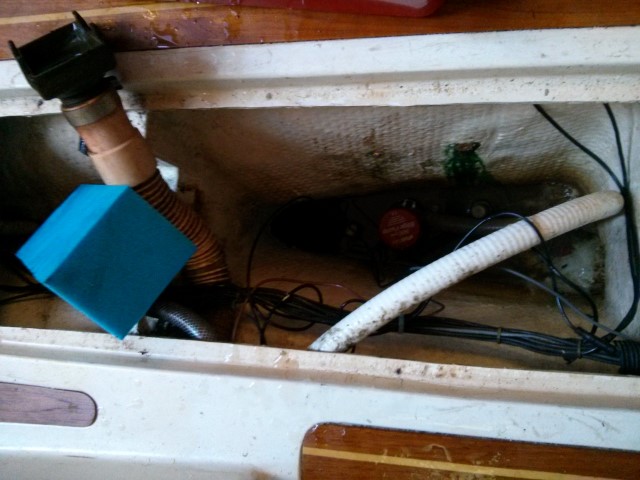
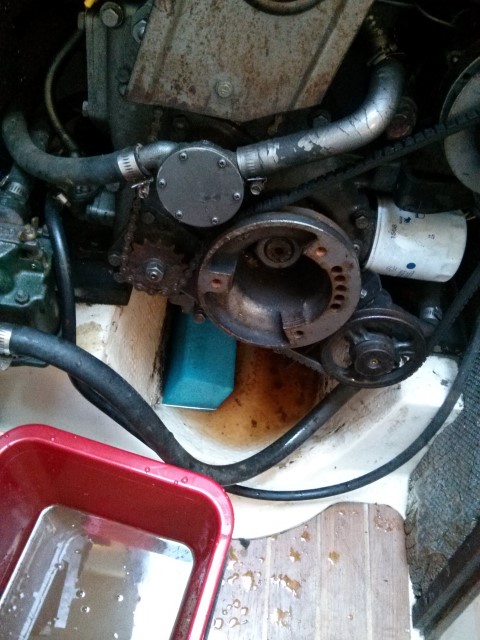
It looks gross, but rest assured it was actually even grosser. Yuk. That took about 40mins, and when I was done I decided I was on a roll so I decided to make like Russia and drain my very own Arial sea (lil’ geography joke for y’all there) – the huge pool of mysterious water under the engine I like to imaginatively call ‘Engine Lake’. I started work, and eventually, Engine Lake was no more. I’ll have to work out how it got there (my guess is either leaking from the cracked exhaust elbow or the rubbers gone on the panel above it) but for now I was happy to have it gone.
At this point I didn’t have much light left after all the work I did, so I took a quick gander at the plumbing, and managed to figure 90% of it out, including the head, which is going to be it’s own stinky entry later on.
With that, the only thing left to do was take a self-satisfied selfie from on top of the boat and help back home.

Tomorrow, finding a way to dry out the bilge area and holes completely, and possibly sealing some holes.


hey man you’re kicking ass, and impact drivers are good. also in the past when i’ve had coolant hoses like that harden up from being many years old the only option to disconnect them from the metal flanges was to cut them away, just too old and brittle and too many heat cycles has taken the rubberyness away from them. Something to give you some piece of mind when you re-install a new transducer or at all your thru-hulls is to have an emergency water stopping device (a plug) strapped at each one so if there is a failure you can push it through and quickly close up the water, they make foam type ones or you can get soft tapered wood plugs. You can see where that HF grounding plate was the copper? or brass stains seeping through into the bilge so water was definitely getting through there, depends on the construction layup of the boat (I think this one is GRP?) But you may have some issues there if there is a core
The hull of the boat is solid fiberglass, no core – luckily! I think I am going to have to cut the piping.
I was nodding along until the part where you duct taped a wrench to some fiberglass and then I thought “dang, bouy”
English translation for those of us who don’t speak “boat”? Hope you have a buttload of rubber gloves boy.
I rediscovered your great blog on a rainy day here in Portugal…I had forgotten how good it is.
I’m no expert, but I’m 99% sure that that’s not a radio grounding plate (although it helps eliminate frequency interference); it’s more of a grounding plate for the boat’s DC system and metal parts, and I have one too. Every boat should have one, except aluminum hulls.
An expert (I mean, a real professional who has done nothing else but work on ships’ electrical systems all his life) explained to me that it’s made of copper, but using some sophisticated method that gives the power to dissipate current. The boat’s DC ground and main metal parts should be bonded and wired to this plate with a thick copper wire…he said something about galvanic corrosion, stray current corrosion protection and all kinds of technical stuff I’ve forgotten.
I’ve had mine since I launched 15 years ago in Canada, it’s still good and I’ve never had corrosion problems of parts in contact with salt water, I think.
Oh interesting! I could very well be – whatever it was was pretty much done for and disintegrating. I currently use my engine as the DC ground which seems to work pretty well.
Thanks for the kind words about the blog and safe sailing!